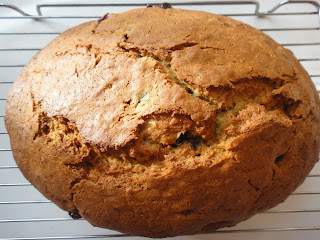
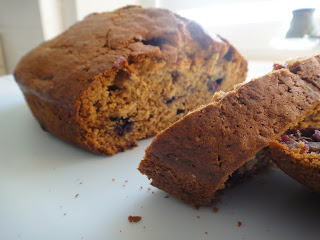
I know it's technically still summer, but the past two days in Bristol have felt a bit more like fall. And I'm not complaining, just loving it. All I want to do on days like these is curl up next to my pup (and husband if he weren't at work), drink some warm tea, and munch on something sweet. So, that's what I did. Plus today is my first day of work at my new job, so it was like a mini vacation.
Printable Recipe
Isn't she a beaut? Bananas, bursting blueberries, and cinnamon all mixed into one lovely bread! What's not to love? Nothing. Nothing is not to love. I had some bananas in the freezer I was meaning to use, plus I promised this post would be coming soon so I thought, "Well, today is pretty much perfect for some warm Blueberry Banana bread". But I can't take full credit for this, I ever so slightly adapted the recipe from Taste of Home.
So, let's get started! First I got out those frozen bananas to thaw as well as the shortening to soften. BTW, NEVER throw away browning bananas. They are perfect for breads, pancakes, etc. Just throw them in the freezer until you are ready to use.
Gathered up the rest of the ingredients. Eggs, sugar, blueberries, flour, baking soda, salt....
Oh look at me all fancy schmancy. "Finest quality" Vanilla extract. Actually...that's all they have at the store.
Next up, creaming the shortening and sugar. I used a table top mixer for this, but a whisk or hand mixer will suffice. I then added the eggs and vanilla extract and mixed until creamy.
In a separate bowl, I whisked all of the dry ingredients. Slowly added the creamed mixture to the dry ingredients until fully mixed. Dropped in the blueberries and folded them in. P.S., recipe calls for 1 cup, which I followed but I would have liked more in the end. Maybe try 2 cups? Yes!
Now, at this point...most people would put the batter into, oh I don't know...a bread pan. But most people probably didn't just move across the globe with minimal kitchen ware, so I made do with what I had. An oval pyrex dish. Hey, you gotta work with what you got...and this is what I got.
Tossed it in the oven at 375 F/176 C and watched that baby rise! Ok, the rising actually took a long time to start, but once it did it was magical! Well, that was easy wasn't it? Honestly, the hardest part is just waiting for it to bake. Fifty minutes seems like an eternity when all you want is just one sliver! Be sure to let it cool down before you take it out of the pan too. I made the impatient mistake once of flipping the pan to get the bread out and it was disaster.
I have to say though, the most impatient one was my husband. The only thing I heard from him when he got home was "When can I eat some bread?". Ummm, when it cools off and I can cut into it without it being a total mess...that's when. Patience truly is a virtue....at least when it comes to baking.
Hope you guys love it as much as I do!
Printable Recipe
Ohh, and one last thing. This makes a pretty large loaf, so if you don't want to wait 50min for a loaf to bake or want some smaller ones to pass around to friends, just use some mini loaf pans and decrease the bake time to about 30 minutes or until toothpick comes out clean. OK...bye.
Ohh, and one last thing. This makes a pretty large loaf, so if you don't want to wait 50min for a loaf to bake or want some smaller ones to pass around to friends, just use some mini loaf pans and decrease the bake time to about 30 minutes or until toothpick comes out clean. OK...bye.


No comments:
Post a Comment